How to Build a Mobile 'Run-and-Gun' Rig for Under $200
Learn how to assemble a professional mobile run-and-gun rig for under $200 using accessible smartphone camera accessories.
Shooting high-quality video on the move requires a setup that balances stability, audio clarity, and agility. Building a mobile run-and-gun rig for under $200 is entirely possible if you know exactly which components to prioritize. You do not need a massive cinema camera to capture compelling footage. Modern smartphones have excellent sensors. The weak points are always ergonomics, audio, and lighting.
By fixing those three elements, you transform a standard phone into a highly capable production tool. This guide outlines exactly how to allocate a $200 budget to get the best possible results for vlogging, street interviews, or fast-paced event coverage.
The Core Concept of Run-and-Gun
A run-and-gun setup is designed for speed. You grab it, hit record, and start moving. If a rig takes ten minutes to assemble, balance, and configure, it fails the basic requirement of the format.
Heavy gimbals often miss the mark here. While they provide buttery smooth footage, they require constant recalibration if you change lenses or add a microphone. They also drain batteries and weigh down your arms during long shoots. A caged grip setup is usually a better choice for pure speed and reliability. It gives your hands a wider stance to naturally stabilize the footage while providing multiple mounting points for essential accessories.
In fact, slightly imperfect, handheld motion often feels more authentic to viewers. If you want to understand why audiences respond well to less polished visual styles, read our breakdown on why low-fi production outperforms your multi-million dollar studio. The goal is controlled rawness, not shaky, unwatchable mess.
Budget Allocation Breakdown
Before buying anything, you need a plan. Here is a realistic way to split a $200 budget to cover all the bases. Prices fluctuate, but these are standard retail ranges for reliable entry-level gear.
| Component | Purpose | Estimated Cost |
|---|---|---|
| Smartphone Cage | Stability and mounting points | $30 - $50 |
| Directional Microphone | Clear, isolated audio | $40 - $60 |
| Mini LED Light | Fill lighting in dark spaces | $25 - $40 |
| Power Bank & Cables | Continuous shooting | $20 - $30 |
| Audio Adapters | Connecting mic to phone | $10 - $15 |
| Total | $125 - $195 |
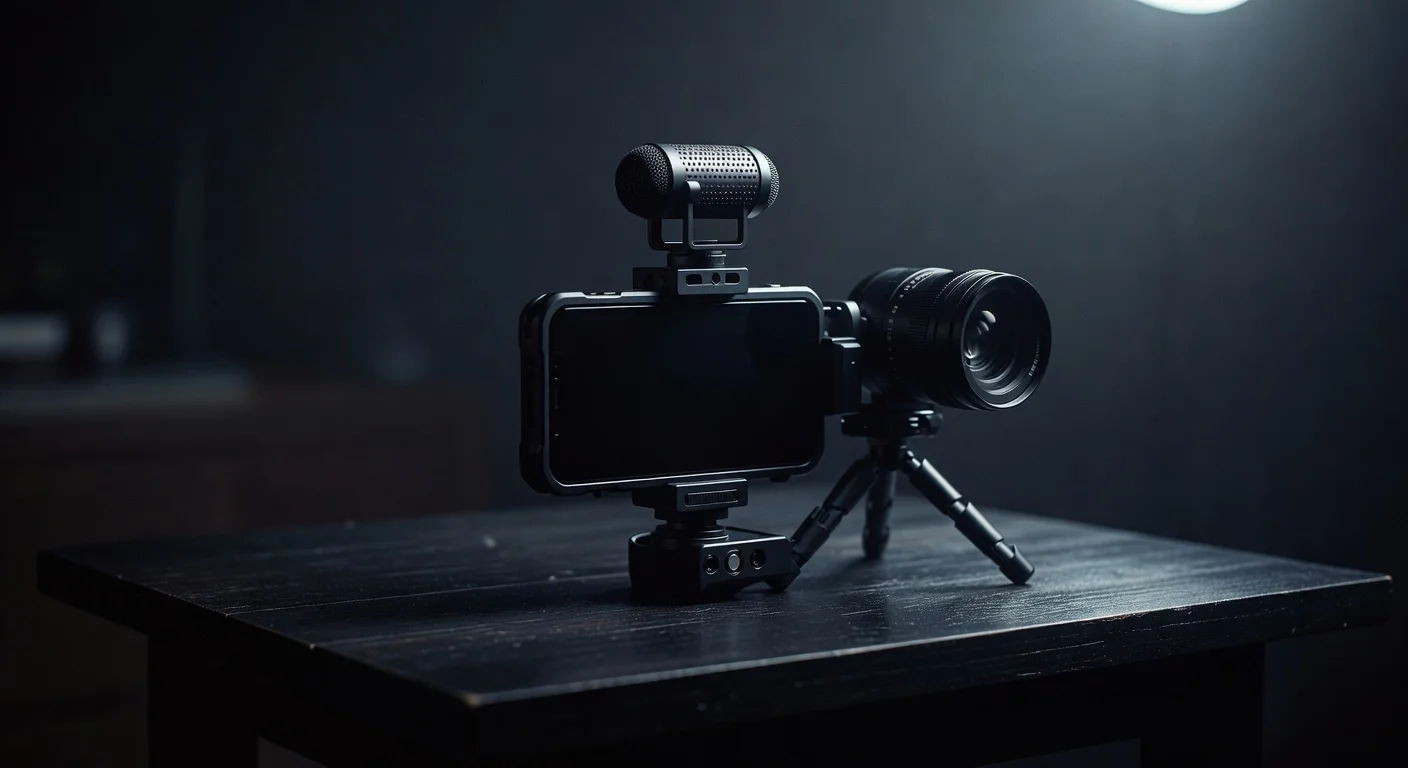
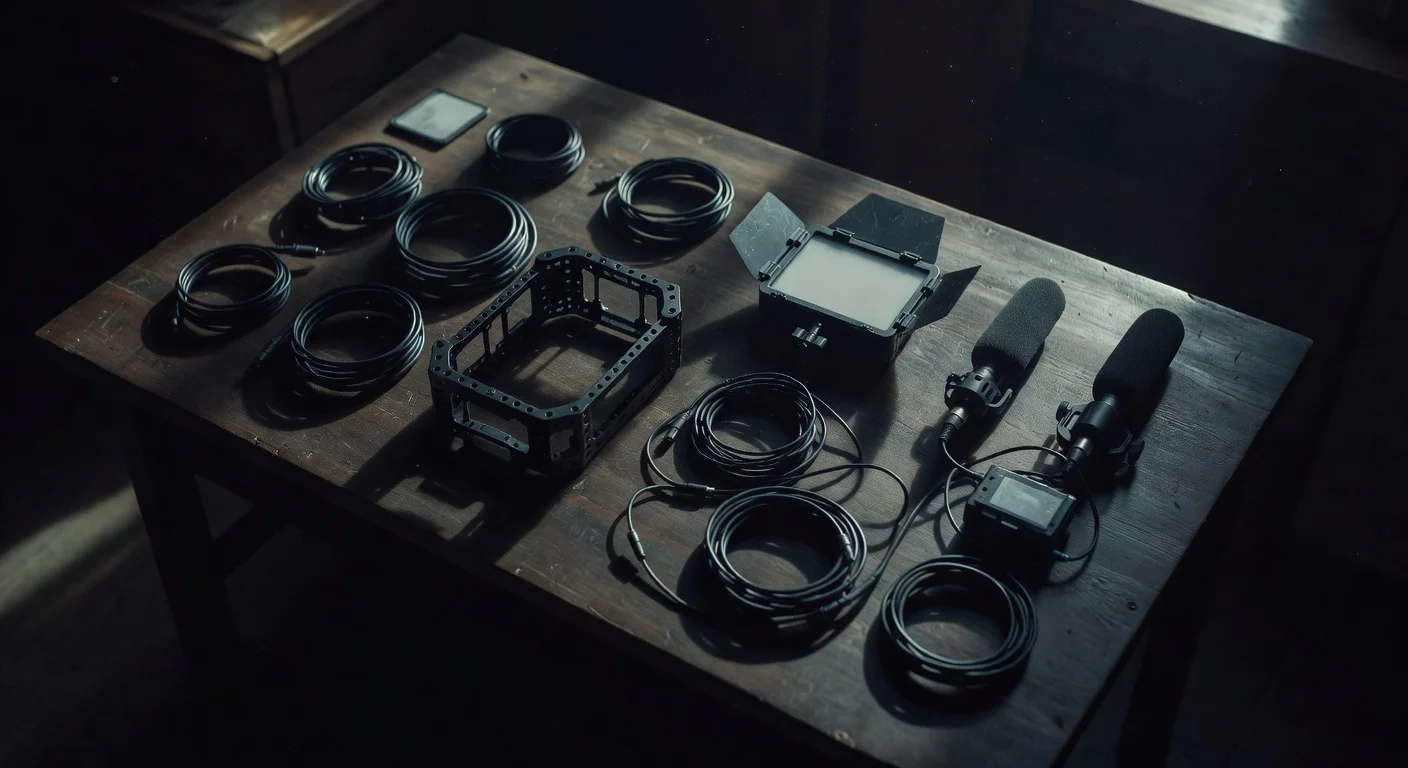
Component 1: The Smartphone Cage ($30 - $50)
The cage is the foundation of your rig. It is a frame that clamps securely around your phone, featuring multiple 1/4"-20 threaded holes and cold shoe mounts.
When you hold a phone bare, your hands are close together. This narrow grip amplifies every micro-jitter from your wrists and footsteps. A cage allows you to grip the device much wider, acting like a steering wheel. This wider stance naturally dampens vibrations.
What to Look For
- Material: Aluminum cages are more durable and rigid than plastic ones, though slightly heavier. Brands like SmallRig and Neewer make excellent universal aluminum cages in this price range.
- Mounting Points: You want at least two cold shoe mounts (one for audio, one for light) and several 1/4"-20 threads on the top, bottom, and sides.
- Clamp Mechanism: Avoid spring-loaded clamps if possible. Look for cages that use a screw-knob mechanism to lock the phone in place. Spring clamps can slip if you bump the rig during a fast movement.
Handles vs. Bare Cage
Some cages come with attachable side handles. If your budget allows, get the handles. They vastly improve ergonomics. If you have to choose between a plastic cage with handles or an aluminum cage without them, take the aluminum cage and grip the frame directly. You can always buy handles later.
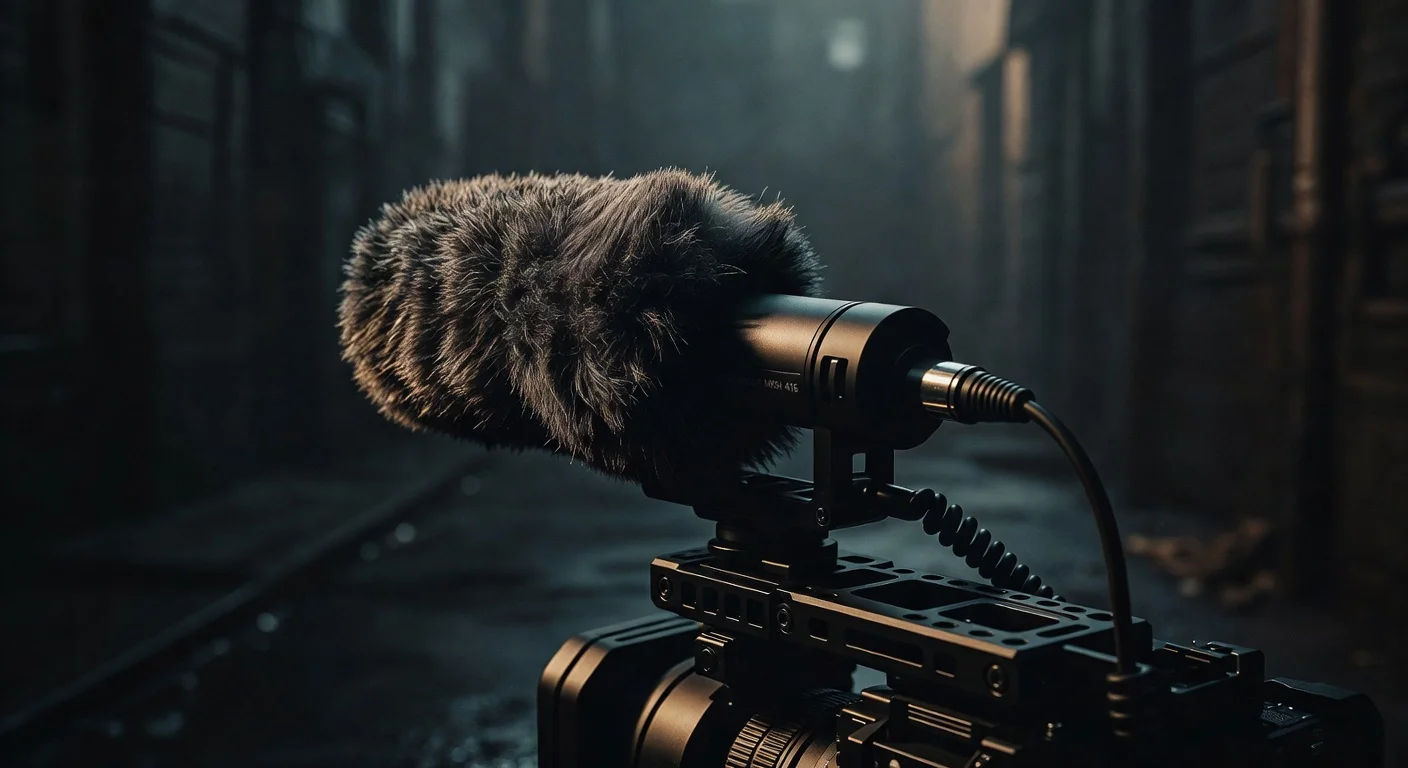
Component 2: The Audio Setup ($50 - $75)
Bad video is forgivable. Bad audio will make viewers scroll away immediately. The built-in microphone on your phone is omnidirectional, meaning it picks up traffic, wind, and crowd noise just as loudly as your voice.
You need a directional shotgun microphone. These mics have a cardioid or super-cardioid pickup pattern, focusing on whatever is directly in front of the lens while rejecting sounds from the sides and rear.
Recommended Budget Microphones
- Rode VideoMicro: A classic for a reason. It requires no batteries (runs on plug-in power from the phone), comes with a high-quality deadcat (windshield), and costs around $50.
- Movo VXR10: A very popular alternative to the Rode. It often costs around $40 and delivers incredibly similar audio quality. It also includes the necessary shock mount and furry windshield.
- Deity V-Mic D4 Mini: Another excellent option in the $50 range, featuring a secondary input jack that allows you to plug in a lavalier mic simultaneously.
The Adapter Trap
Smartphones no longer have headphone jacks. You will need a dongle to connect a standard 3.5mm microphone to your device.
Do not buy cheap, unbranded gas station dongles for this. They often lack the internal DAC (Digital-to-Analog Converter) required to process the mic's signal properly, resulting in static or complete silence. Buy the official Apple Lightning-to-3.5mm adapter or a high-quality Google/Samsung USB-C adapter.
Crucial detail: Microphones usually come with two cables. One has three rings on the plug (TRRS), and one has two rings (TRS). Smartphones require the TRRS cable to recognize the microphone. If you use the TRS cable, the phone will ignore the external mic and continue using its internal one.
Component 3: Portable Lighting ($25 - $40)
Smartphone sensors are tiny. They need a lot of light to produce a clean image. When you shoot outdoors during the day, this isn't a problem. When you move indoors, into shadows, or shoot at night, the phone compensates by cranking up the ISO, which introduces ugly digital noise and grain.
A small, battery-powered LED panel mounted to your cage solves this. You don't need it to illuminate a whole room; you just need it to put a clean wash of light on your subject's face. If you want to understand the mechanics of shaping light in difficult spaces, we have a detailed guide on 5 specific lighting setups to mimic natural sunlight in a basement office. The same principles of fill and key lighting apply on a smaller scale here.
Specs to Check
- Bi-Color Capability: Make sure the light lets you adjust the color temperature (usually from 3200K to 5600K). You need to match the light to your environment. If you are in a room with warm tungsten bulbs, a harsh white LED will look terrible.
- Battery Life: Look for built-in rechargeable batteries that last at least 90 minutes at maximum brightness.
- Diffusion: Bare LEDs cast harsh, unflattering shadows. Look for lights that come with a silicone diffusion cover. Brands like Ulanzi and Aputure (their base Amaran line) make great mini panels in the $30 range.
Component 4: Continuous Power ($20 - $30)
Recording 4K video while running a bright screen will drain a smartphone battery in less than two hours. A dead phone means the shoot is over.
You need a power bank. For a run-and-gun rig, you want something slim enough to mount to the cage or slip into your pocket while running a cable up to the phone.
- Capacity: A 10,000mAh power bank is the sweet spot. It provides roughly two full charges for a modern smartphone without being too heavy.
- Mounting: You can buy a cheap spring-loaded clamp that screws into the back of your cage to hold the power bank. Alternatively, use heavy-duty velcro strips to attach it directly to the metal frame.
- Cabling: Buy short, right-angle charging cables. A standard 3-foot cable will dangle, snag on doorknobs, and ruin your shot. A 6-inch right-angle cable keeps the rig clean and compact.
Assembling and Balancing the Rig
Putting the gear together requires some thought about weight distribution. If your rig is top-heavy, your wrists will fatigue quickly.
Step-by-Step Assembly
- Mount the Phone: Center your phone in the cage. Make sure the clamp is avoiding the volume and power buttons.
- Attach the Light: Put the LED panel on the center top cold shoe mount. Because the light is the heaviest accessory, keeping it centered prevents the rig from leaning left or right.
- Attach the Microphone: Mount the mic on an offset cold shoe. Make sure the furry windshield does not dip into the frame of your wide-angle lens.
- Wire it Up: Run the audio cable from the mic, loop it once around the shock mount to reduce cable noise, and plug it into the dongle.
- Secure the Power: Clamp or velcro the power bank to the back or bottom of the cage. Connect the short right-angle cable.
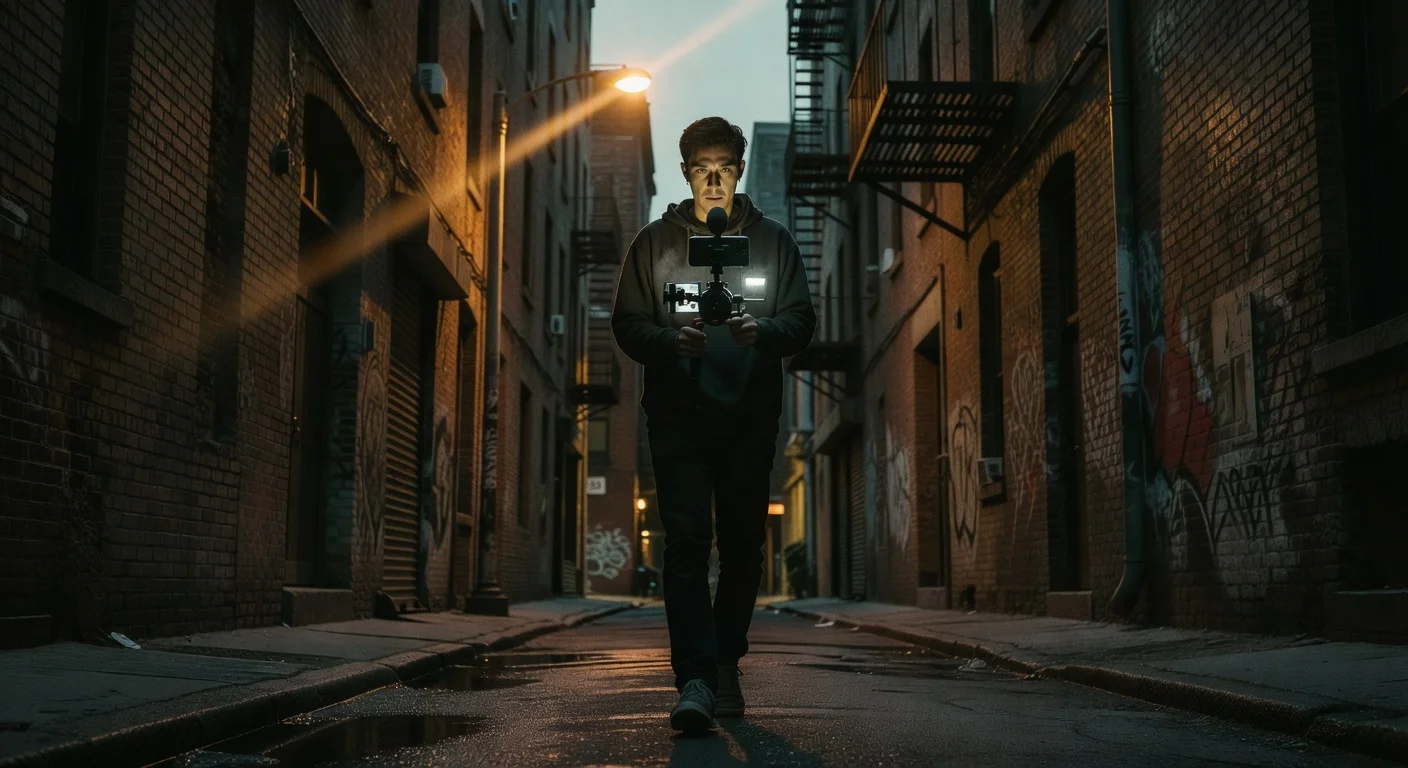
The Grip and Movement Technique
Holding the rig correctly is just as important as the gear itself. Keep your elbows tucked tightly against your ribs. This turns your torso into a shock absorber. When you need to pan, rotate your hips rather than just moving your arms.
When walking, use the "ninja walk." Bend your knees slightly and roll your steps from heel to toe. This minimizes the up-and-down vertical bounce that optical image stabilization struggles to correct.
Software and Settings
Hardware is only half the equation. To get the most out of your $200 rig, you need to control the camera software. Default camera apps prioritize exposure over motion blur, which often results in choppy, hyper-sharp video that screams "shot on a smartphone."
Frame Rates and Shutter Speed
For a cinematic look, shoot at 24 frames per second (fps). The general rule of video is to keep your shutter speed at double your frame rate. So, for 24fps, you want a shutter speed of 1/48th of a second (or 1/50th, which is usually the closest option).
Maintaining a 1/50th shutter speed in bright daylight will overexpose your image massively. To fix this on a budget, you can buy a clip-on Variable ND (Neutral Density) filter for about $15. It acts like sunglasses for your lens, allowing you to keep that slower shutter speed for natural motion blur without blowing out the highlights.
Third-Party Apps
Consider downloading a dedicated video app. Blackmagic Cam is currently free and offers incredible manual control over ISO, shutter speed, white balance, and audio levels. It completely unlocks the potential of a caged smartphone.
Testing Your Setup in the Real World
Once your rig is built, you need to test it under pressure. Go to a busy street and practice pulling focus, monitoring your audio levels, and adjusting your LED light on the fly.
If you are a creator using this rig for live streaming or real-time event coverage, you will want to track how your audience responds to the upgraded production quality.
- Use the TikTok Live Video Views Counter Tool to monitor real-time engagement when you stream from your new mobile setup.
- If you are doing street interviews or collaborations, check the TikTok Follower Count Tool to see immediate growth spikes after posting high-quality, on-the-ground content.
- Doing a live challenge or battle? The TikTok Live Follower Comparison tool is great for tracking head-to-head metrics in real time.
Live streaming from a sturdy rig with great audio is one of the fastest ways to build an audience. If you want to maximize those sessions, review our guide on 10 TikTok Live strategies to turn viewers into loyal followers.
Scripting for Mobile Shoots
Run-and-gun content thrives on energy. You don't have a teleprompter, so you need to know your talking points cold.
The best mobile content uses the environment to drive the story. If you are walking through a location, use the movement to transition between ideas. Start your video with a strong hook, introduce a question, and delay the answer while you move to a new location. This technique is highly effective for retention. We cover this exact structure in our breakdown of scripting for retentive attention using the narrative open loop strategy.
Pre-Shoot Checklist
When you are rushing out the door, it is easy to forget the small things that ruin a shoot. Keep this checklist handy:
- Batteries charged on the LED light and power bank.
- Phone storage cleared (4K video eats gigabytes fast).
- Deadcat/windshield secured on the microphone.
- TRRS cable packed (and the adapter dongle).
- Lens wiped clean with a microfiber cloth.
- Airplane mode turned on (a phone call will stop your recording).
Upgrading the Rig Later
The beauty of a cage-based system is that it scales. The $200 you spend today is not wasted if you decide to upgrade later. You can keep the cage and light, and swap out the microphone for a professional wireless lavalier system like the DJI Mic.
You can also start investing in mobile lenses. Moment and Sandmarc make fantastic wide-angle and anamorphic lenses that screw directly into compatible phone cases or cage mounts. An anamorphic lens will give you those classic cinematic black bars and horizontal lens flares, completely disguising the fact that you are shooting on a phone.
Final Thoughts
A $200 budget is more than enough to build a highly effective run-and-gun rig. Prioritize the cage for stability, spend the largest chunk of your budget on a directional microphone for clear audio, and fill in the gaps with a portable LED and power bank.
Keep the setup lightweight. The heavier the rig gets, the less likely you are to actually take it outside and use it. The best camera rig is the one that stays out of your way and lets you focus entirely on the subject in front of the lens. Assemble your gear, lock in your settings, and go shoot.

Written by
Olivia Miller
Four years managing TikTok accounts for small and mid-sized creators. Five clients past a million followers, a few past five.
More from Olivia